メディア管理
メディアドライブは、Paideia LMS 内のすべてのメディアファイル用の個人ストレージスペースです。アップロードするすべてのファイルはアカウントに関連付けられ、メディアファイルの表示、整理、ダウンロード、名前変更、削除が可能です。メディアドライブは、課題、ノート、その他のコンテンツタイプ全体でのメディアアップロードの基盤として機能します。
Paideia メディアドライブがユニークな理由
Section titled “Paideia メディアドライブがユニークな理由”Paideia の組み込みメディアドライブは、従来の学習管理システムとは一線を画す強力な機能です。OneDrive、Google Drive、Dropbox などの外部ストレージ統合に依存するほとんどの LMS プラットフォームとは異なり、Paideia はプラットフォームに直接組み込まれた完全に統合されたメディア管理システムを提供します。
組み込み統合
Section titled “組み込み統合”従来の LMS の制限:
- ほとんどの LMS プラットフォームは外部クラウドストレージサービスとの統合が必要
- 外部ドライブは LMS とは別のシステム
- 統合が適切に設定されていない場合、権限とアクセス制御の問題が頻繁に発生
- 学生と講師は権限の不一致によりファイルへのアクセスに困難を抱える
- システム境界を越えるとファイル共有が複雑になる
Paideia の利点:
- ネイティブ統合:メディアドライブは LMS に直接組み込まれており、別のシステムではありません
- 自動権限:すべての権限とアクセス制御はシステムによって自動的に設定されます
- 権限の問題なし:すべてが同じシステム内にあるため、システム間の権限競合はありません
- シームレスなアクセス:学生と講師は外部認証を処理することなくファイルにアクセスできます
- 統一された体験:すべてのメディア操作がプラットフォーム全体で一貫して機能します
実質的に無制限のストレージ
Section titled “実質的に無制限のストレージ”Paideia は S3 互換ストレージ(AWS S3、MinIO、その他の S3 互換サービスなど)を使用し、以下を提供します:
- スケーラブルなストレージ:ストレージ容量はニーズに応じてスケールします
- コスト効率:使用した分だけ支払います
- 信頼性:エンタープライズグレードのストレージインフラストラクチャ
- ハードリミットなし:ストレージクォータを持つ外部統合とは異なり、Paideia の S3 ベースのストレージは実質的に無制限です
管理者は必要に応じてユーザーごとのストレージクォータを設定できますが、基盤となるストレージシステムは任意の量のデータに対応できるようにスケールできます。
包括的な管理
Section titled “包括的な管理”管理者向けに、Paideia は詳細な統計と管理ツールを提供します:
- ストレージ分析:どのユーザーがどれだけのストレージを使用しているかを確認
- ファイルタイプ分析:どのタイプのファイルが最も多くのストレージを消費しているかを理解
- 使用状況追跡:プラットフォーム全体でメディアファイルの使用状況を監視
- 孤立ファイルの検出:未使用のファイルを特定してクリーンアップ
- システム全体のビュー:単一のインターフェースからすべてのメディアファイルを管理
これらの統計は以下に非常に価値があります:
- 容量計画:ストレージ成長トレンドを理解
- リソース管理:高ストレージ使用量のユーザーを特定
- コスト最適化:ストレージ使用を最適化する機会を見つける
- システムヘルス:システム全体のメディア使用状況を監視
メディアドライブは以下を提供します:
- 個人ストレージ:アップロードしたすべてのメディアファイルを1つの場所に
- 複数の表示モード:好みに応じたカードビューとテーブルビュー
- ファイル操作:ファイルのアップロード、ダウンロード、名前変更、削除
- ストレージクォータ:ストレージ使用量と制限の視覚的な表示
- メディアプレビュー:画像、オーディオ、ビデオ、PDF ファイルのインラインプレビュー
- 使用状況追跡:削除前にメディアファイルがどこで使用されているかを確認
- バッチ操作:複数のファイルを一度に選択して削除
メディアドライブへのアクセス
Section titled “メディアドライブへのアクセス”メディアドライブにアクセスする方法は2つあります:
方法1:ユーザーメニュー経由
Section titled “方法1:ユーザーメニュー経由”- 上部ナビゲーションバーのユーザープロフィールをクリック
- ドロップダウンメニューから “メディア” を選択
/user/mediaのメディアドライブページに移動します
方法2:ユーザーレイアウトタブ経由
Section titled “方法2:ユーザーレイアウトタブ経由”- 任意のユーザープロフィールページ(自分のものまたは他のユーザーのもの)に移動
- ユーザーレイアウトナビゲーションの “メディア” タブをクリック
- メディアドライブページにすべてのメディアファイルが表示されます
ファイルのアップロード
Section titled “ファイルのアップロード”メディアファイルをドライブにアップロードするには:
- メディアドライブページに移動
- ヘッダーの ”+ アップロード” ボタンをクリック
- コンピューターから1つ以上のファイルを選択
- ファイルが自動的にアップロードされます
サポートされているファイルタイプ
Section titled “サポートされているファイルタイプ”メディアドライブは、以下のようなさまざまなファイルタイプを受け入れます:
- 画像:JPEG、PNG、GIF、WebP、SVG
- オーディオ:MP3、WAV、OGG、M4A
- ビデオ:MP4、WebM、OGG、MOV
- ドキュメント:PDF、DOC、DOCX、XLS、XLSX、PPT、PPTX
- テキスト:TXT、MD
- アーカイブ:ZIP、RAR、7Z
アップロード制限
Section titled “アップロード制限”アップロードファイルサイズは、管理者が設定したサイト全体のアップロード制限によって制限されます。制限を超えるファイルをアップロードしようとすると、最大許可ファイルサイズを示すエラーメッセージが表示されます。
メディアの表示
Section titled “メディアの表示”メディアドライブは、ファイルを表示するための2つの表示モードを提供します:
カードビュー
Section titled “カードビュー”カードビューは、メディアファイルを視覚的なカードとして表示します:
- サムネイル:画像プレビューまたはファイルタイプアイコン
- ファイル情報:名前、サイズ、作成日
- クイックアクション:選択用のチェックボックス、アクションメニュー(3つのドット)
- インラインプレビュー:メディアファイル用のオーディオおよびビデオプレーヤー
テーブルビュー
Section titled “テーブルビュー”テーブルビューは、メディアファイルをデータテーブル形式で表示します:
- 列:ファイル名、サイズ、作成日、アクション
- ソート可能な列:列ヘッダーをクリックしてソート
- 行選択:複数のファイルを選択するためのチェックボックス
- コンパクト表示:一度に多くのファイルを表示
ヘッダーの “カード” と “テーブル” トグルボタンを使用してビューを切り替えます。
メディアのプレビュー
Section titled “メディアのプレビュー”メディアドライブは、さまざまなファイルタイプのインラインおよびフルサイズプレビューをサポートします:
インラインプレビュー
Section titled “インラインプレビュー”- 画像:カードビューに表示されるサムネイル
- オーディオ:カードビューにコントロール付きのオーディオプレーヤー
- ビデオ:カードビューにコントロール付きのビデオプレーヤー(最大150px高さ)
フルサイズプレビューモーダル
Section titled “フルサイズプレビューモーダル”任意のメディアファイルのアクションメニュー(3つのドット)の “プレビュー” オプションをクリックしてプレビューモーダルにアクセスします。モーダルは以下をサポートします:
- 画像:適切なスケーリングを備えたフルサイズ画像
- オーディオ:すべてのコントロールを備えたフルオーディオプレーヤー
- ビデオ:すべてのコントロールを備えたフルビデオプレーヤー(最大80vh高さ)
- PDF:iframe 経由のブラウザネイティブ PDF ビューアー
ファイルのダウンロード
Section titled “ファイルのダウンロード”メディアファイルをダウンロードするには:
- ファイルカードまたはテーブル行のアクションメニュー(3つのドット)をクリック
- “ダウンロード” を選択
- ファイルが元のファイル名でダウンロードされます
ファイルは、正しいファイル名が使用されるように、適切な Content-Disposition ヘッダーでダウンロードされます。
ファイルの名前変更
Section titled “ファイルの名前変更”メディアファイルの名前を変更するには:
- ファイルのアクションメニュー(3つのドット)をクリック
- “名前変更” を選択
- モーダルダイアログに新しいファイル名を入力
- “保存” をクリックして確認
名前変更操作は、データベースレコードと S3 ストレージファイルの両方を更新し、システム全体で一貫性を確保します。
ファイルの削除
Section titled “ファイルの削除”ファイルを個別にまたはバッチで削除できます:
単一ファイルの削除
Section titled “単一ファイルの削除”- ファイルのアクションメニュー(3つのドット)をクリック
- “削除” を選択
- ダイアログで削除を確認
- ファイルがデータベースと S3 ストレージの両方から削除されます
- チェックボックス(カードビュー)または行選択(テーブルビュー)を使用して複数のファイルを選択
- 表示される “選択したものを削除” ボタンをクリック
- ダイアログで削除を確認
- 選択したすべてのファイルが削除されます
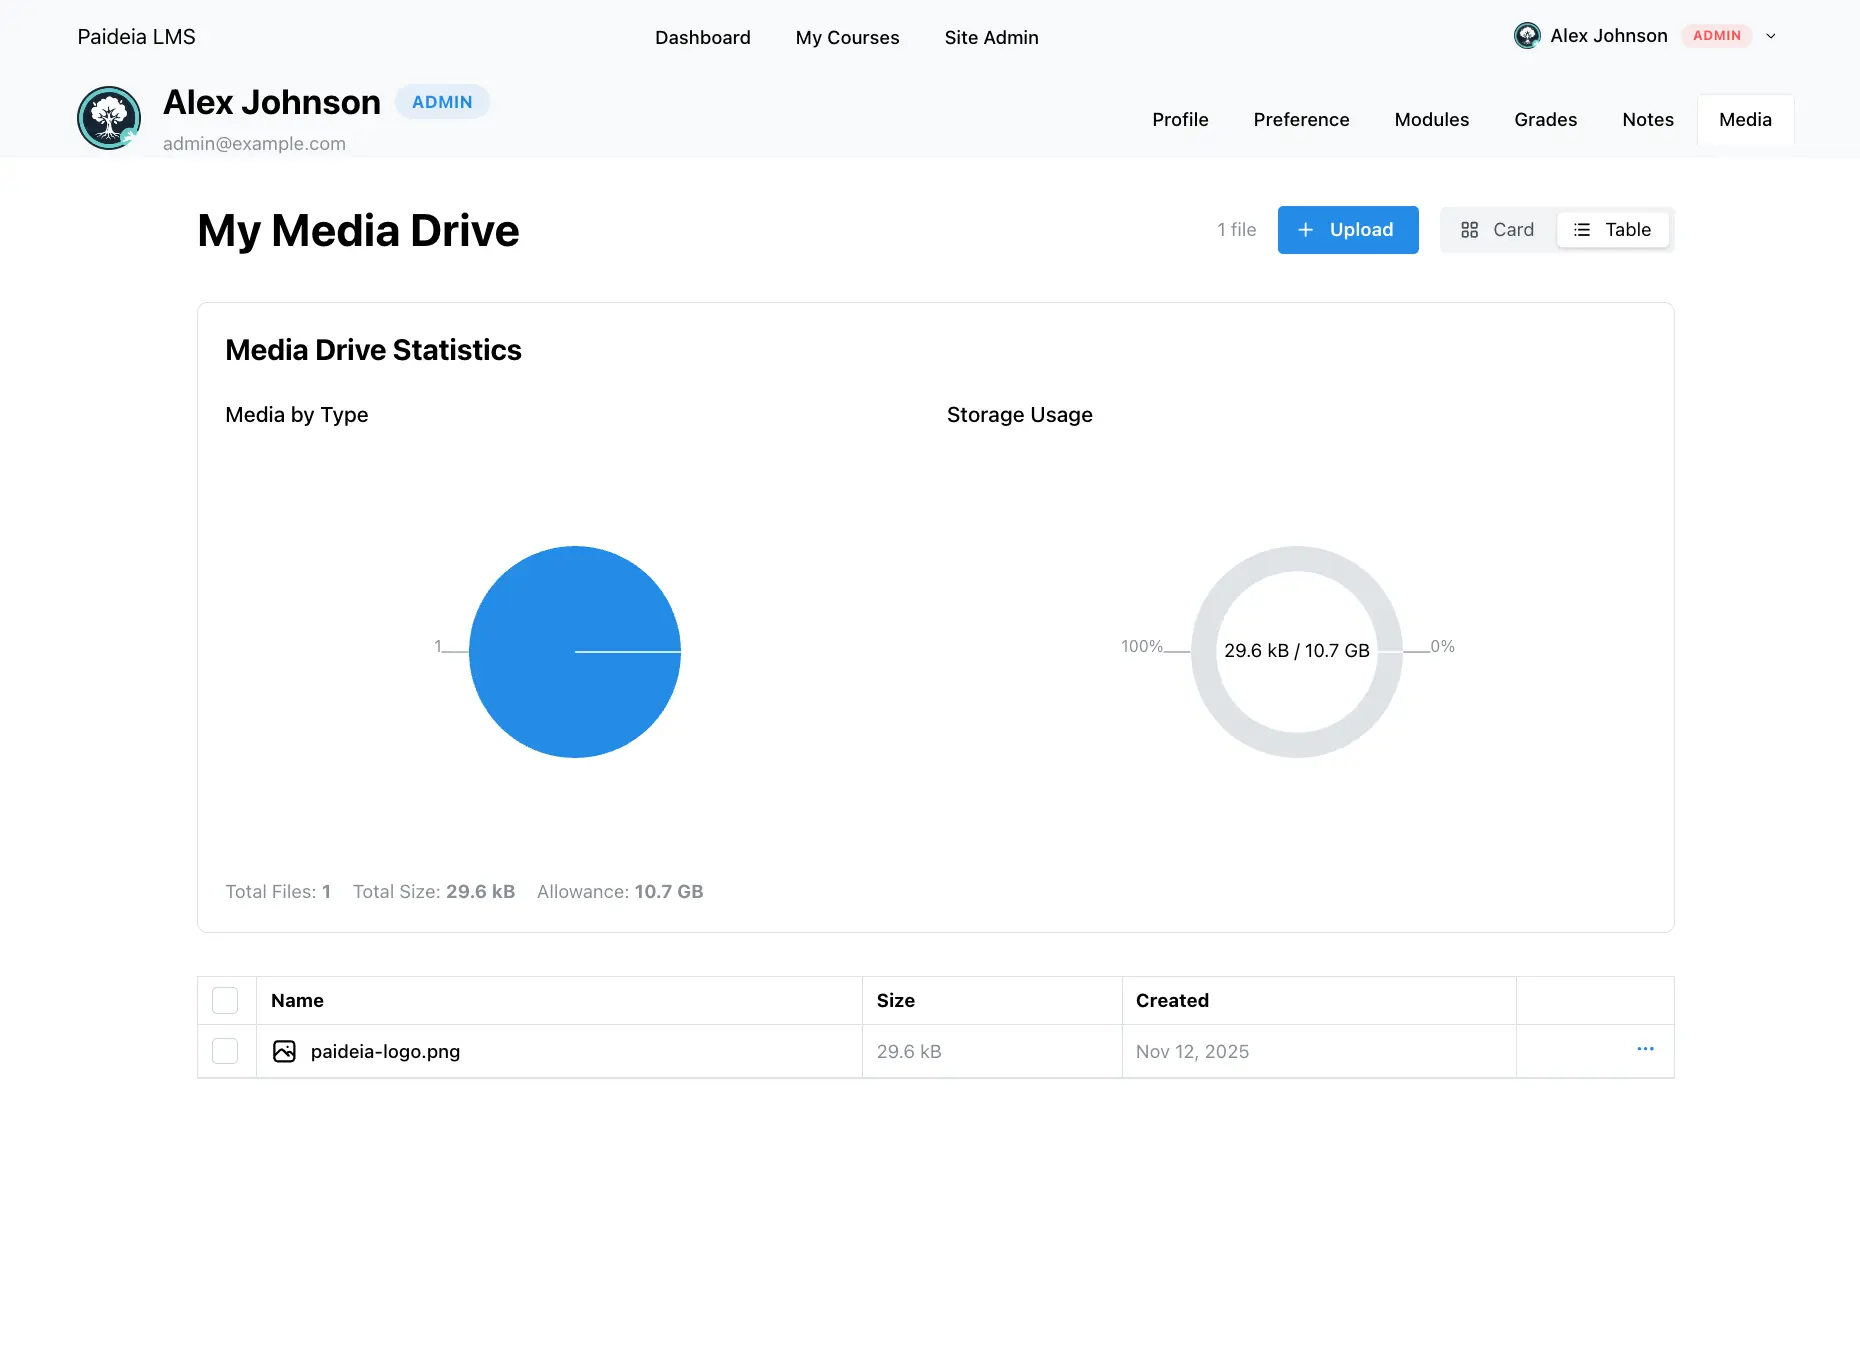
ストレージクォータ
Section titled “ストレージクォータ”メディアドライブは、視覚的なドーナツチャートでストレージ使用量を表示します:
ストレージ制限が設定されている場合
Section titled “ストレージ制限が設定されている場合”- 使用済みストレージ:使用したストレージ量を表示
- 利用可能なストレージ:残りのストレージ量を表示
- チャートラベル:“X / Y”(使用済み / 制限)を表示
- 割り当てテキスト:合計ストレージ割り当てを表示
ストレージが無制限の場合
Section titled “ストレージが無制限の場合”- 使用済みストレージ:使用したストレージ量のみを表示
- チャートラベル:使用量のみを表示
- 割り当てテキスト:“無制限” を表示
ストレージクォータは管理者によって設定され、課題、ノート、その他のコンテンツで使用されるものを含む、アップロードするすべてのメディアファイルに適用されます。
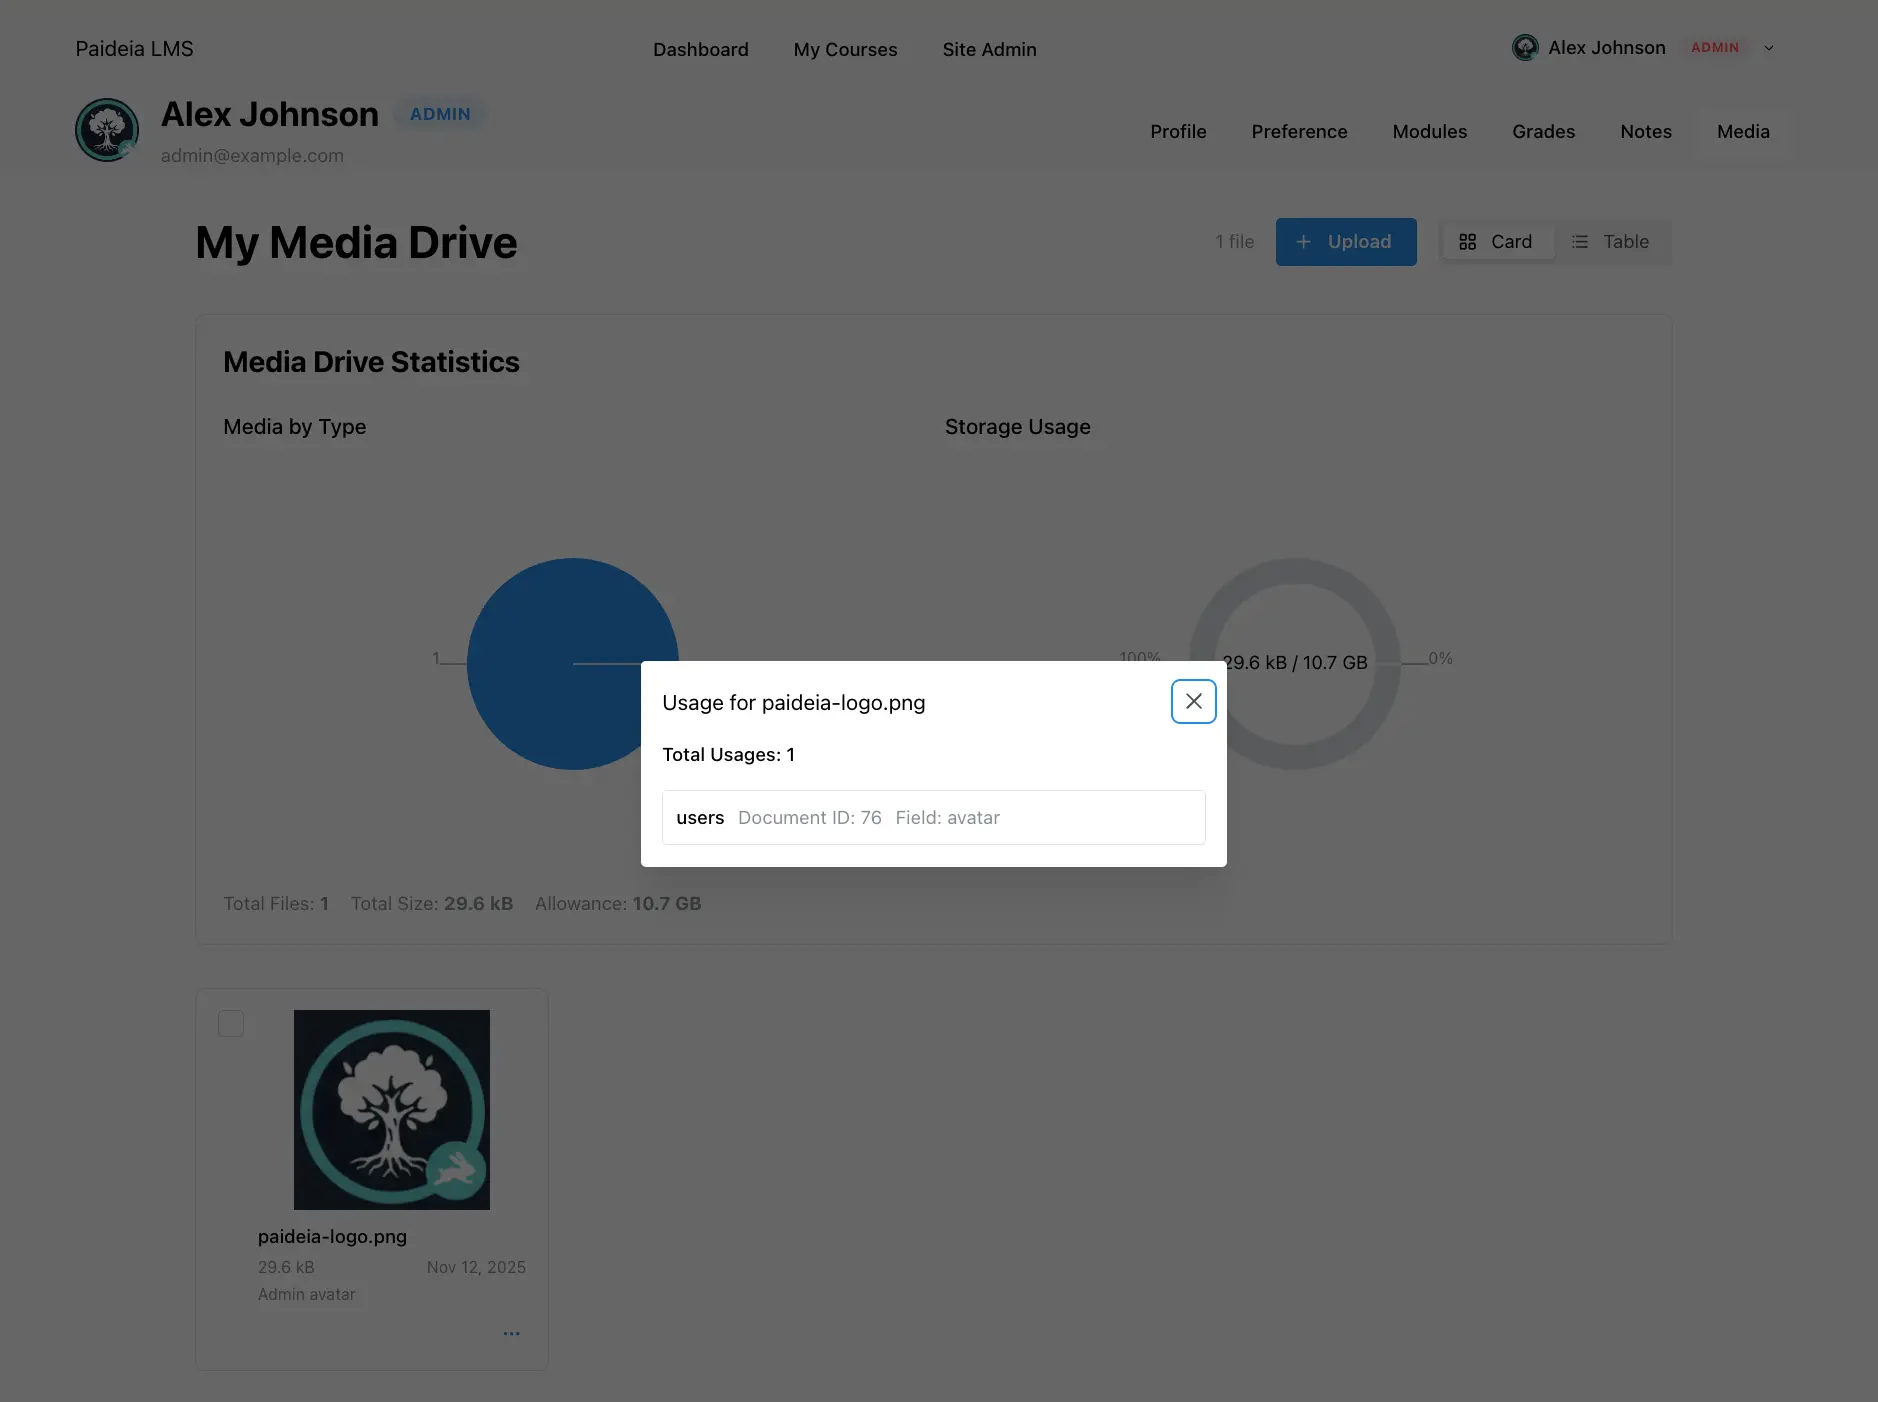
メディア使用状況追跡
Section titled “メディア使用状況追跡”メディアファイルを削除する前に、それらがどこで使用されているかを確認できます:
メディア使用状況の表示
Section titled “メディア使用状況の表示”- 任意のメディアファイルのアクションメニュー(3つのドット)をクリック
- “使用状況を表示” を選択
- モーダルにファイルが参照されているすべての場所が表示されます
使用状況情報
Section titled “使用状況情報”使用状況モーダルには以下が表示されます:
- 合計使用数:ファイルが参照されている場所の数
- 使用状況の詳細:各使用状況のコレクション名、ドキュメント ID、フィールドパス
一般的な使用場所には以下が含まれます:
- ユーザーアバター:
usersコレクション、avatarフィールド - コースサムネイル:
coursesコレクション、thumbnailフィールド - 課題添付ファイル:
assignment-submissionsコレクション、attachments[].fileフィールド - ディスカッション添付ファイル:
discussion-submissionsコレクション、attachments[].fileフィールド - コンテンツメディア:
courses、pages、notesコレクション、mediaリレーションフィールド
まだ使用中のメディアファイルを削除しようとすると、システムは以下を実行します:
- 削除前にすべての使用状況をチェック
- 使用状況が見つかった場合、削除を防止
- メディア ID と使用数を含むエラーメッセージを表示
- 削除前にすべての参照を削除する必要があります
この保護により、コンテンツでまだ参照されているファイルの誤削除を防ぎます。
ベストプラクティス
Section titled “ベストプラクティス”メディアの整理
Section titled “メディアの整理”- 説明的なファイル名を使用:ファイルを見つけやすくするために、ファイル名を明確に付けます
- 必要に応じてアップロード:一括ではなく、必要なときにファイルをアップロードします
- 削除前に使用状況を確認:ファイルを削除する前に常に使用状況を確認します
- ストレージを監視:制限に達しないようにストレージクォータに注意を払います
ファイル管理
Section titled “ファイル管理”- 定期的なクリーンアップ:定期的に未使用のファイルを確認して削除します
- バッチ操作:複数のファイルを一度にクリーンアップするためにバッチ削除を使用します
- 使用前にプレビュー:コンテンツで使用する前に、プレビュー機能を使用してファイルを確認します
ストレージ管理
Section titled “ストレージ管理”- ファイルサイズを最適化:可能な限り画像とビデオを圧縮します
- 適切な形式を使用:品質とサイズのバランスを取るファイル形式を選択します
- クォータを監視:制限内に留まるように定期的にストレージ使用量を確認します
トラブルシューティング
Section titled “トラブルシューティング”ファイルをアップロードできない
Section titled “ファイルをアップロードできない”ファイルをアップロードできない場合:
- ファイルサイズがアップロード制限内であることを確認
- ファイルタイプがサポートされていることを確認
- 利用可能なストレージクォータがあることを確認(制限が設定されている場合)
- インターネット接続を確認
- 問題が続く場合は管理者に連絡
ファイルが表示されない
Section titled “ファイルが表示されない”アップロードしたファイルが表示されない場合:
- ページを更新
- 正しいユーザーのメディアドライブを表示していることを確認
- アップロードが正常に完了したことを確認
- ブラウザコンソールでエラーを確認
ファイルを削除できない
Section titled “ファイルを削除できない”ファイルを削除できない場合:
- 使用状況モーダルを確認して、ファイルがどこで参照されているかを確認
- 削除を試みる前に、ファイルへのすべての参照を削除
- ファイルを削除する権限があることを確認(自分のファイルのみ削除可能)
- 他のユーザーによって参照されているファイルを削除する必要がある場合は、管理者に連絡
ストレージクォータの問題
Section titled “ストレージクォータの問題”ストレージ制限に達している場合:
- ストレージチャートで現在の使用量を確認
- 未使用のファイルを削除してスペースを解放
- 管理者に連絡してクォータの増加をリクエスト
- アップロード前にファイルサイズを最適化することを検討
- サイトポリシー - ストレージクォータとアップロード制限について学ぶ
- 管理者メディア管理 - 管理者はすべてのシステムメディアを表示および管理できます
- ユーザー概要 - ユーザーロールと権限について学ぶ